
How to generate parametric tiles ready for 3D printing with the free Blender’s Sverchok add-on.
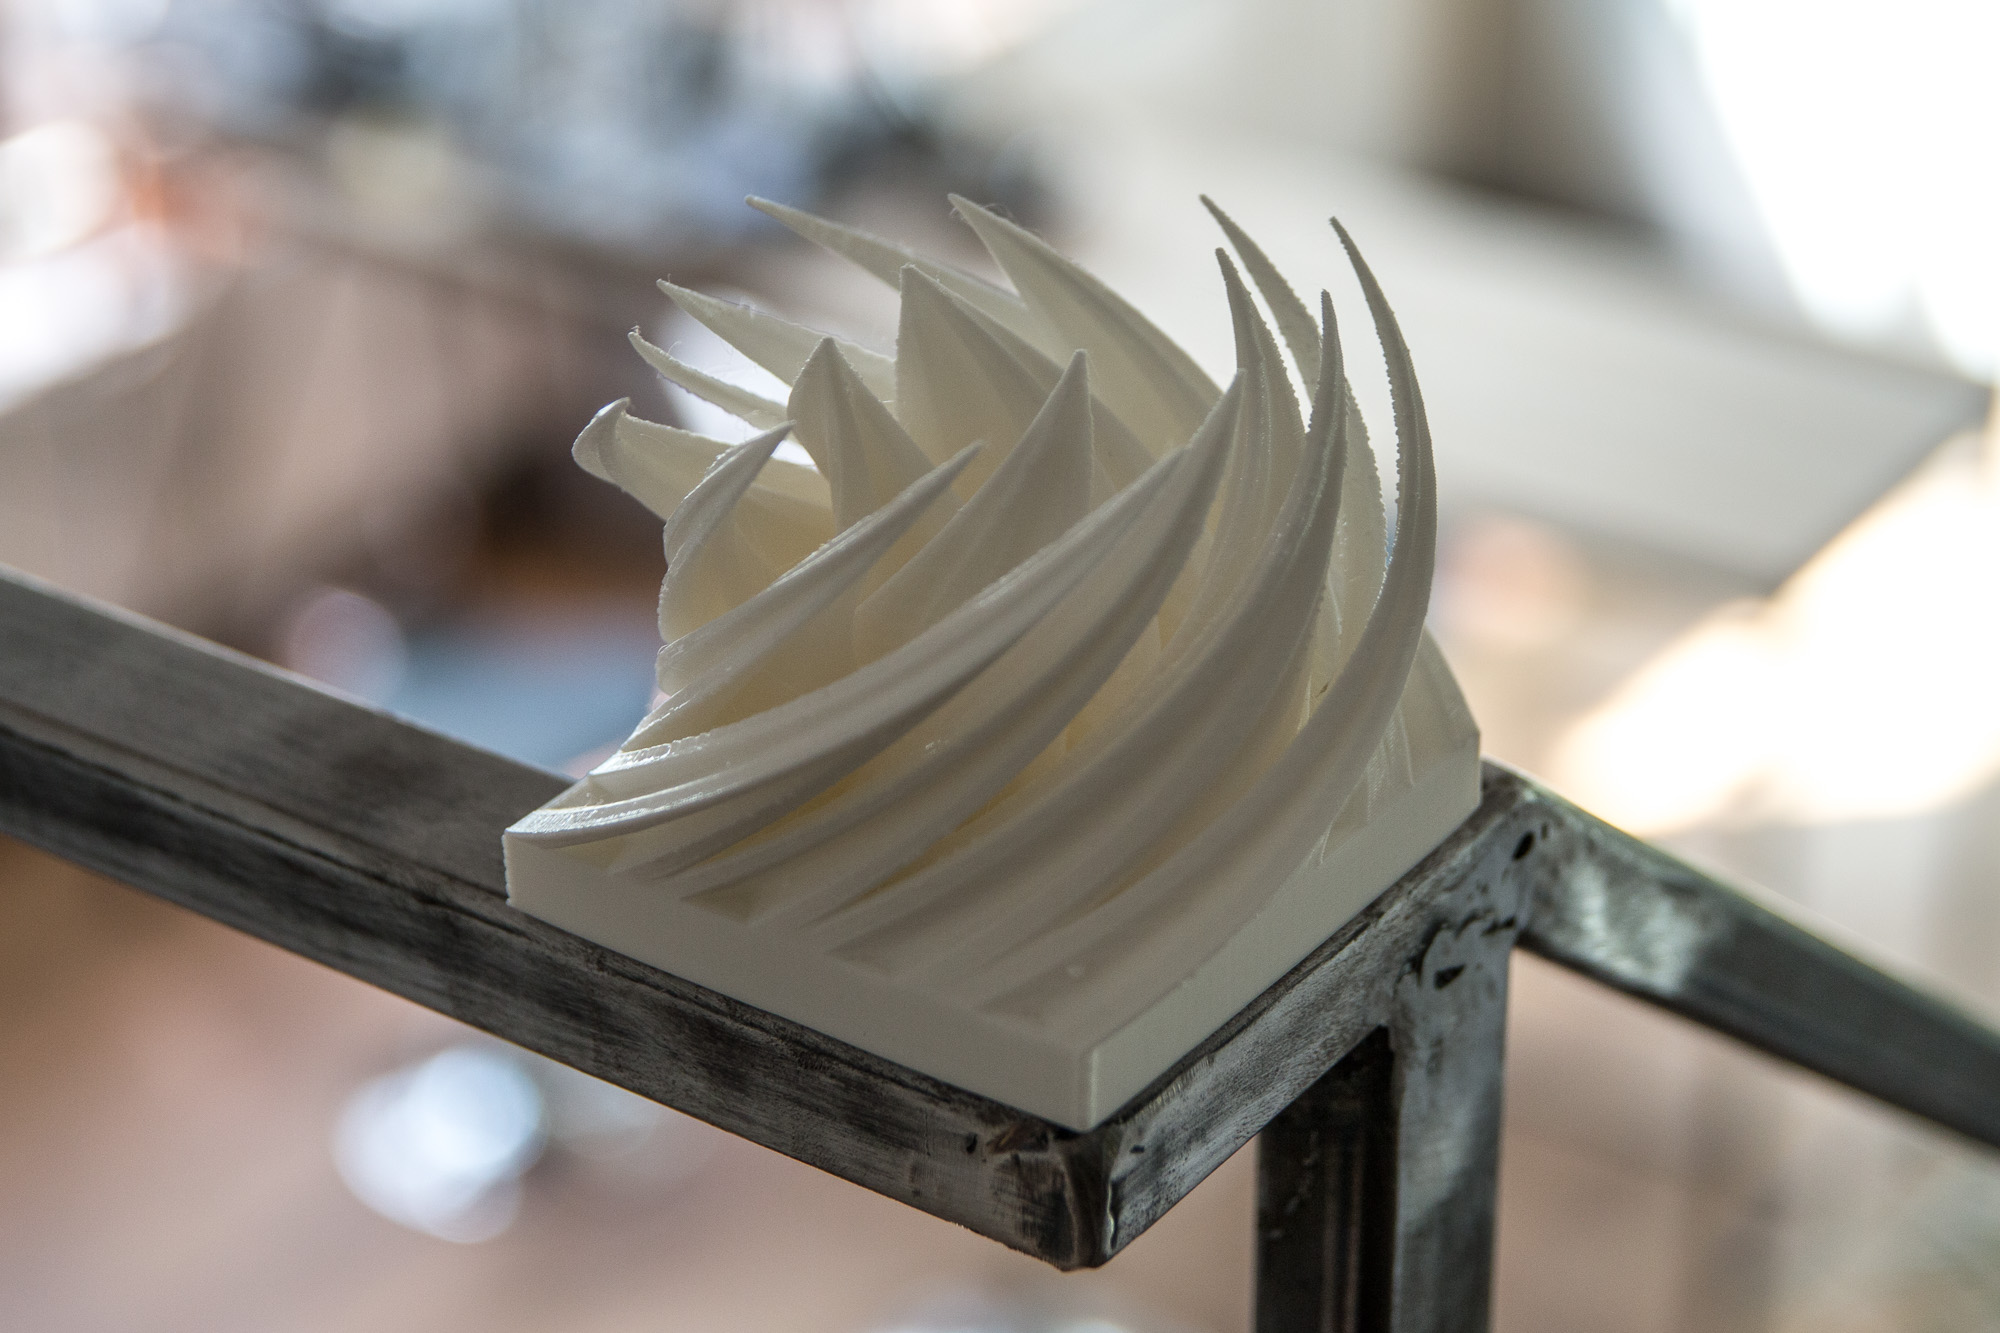
Some time ago I got very intrigued by this article: 3D Printed Patterned Landscapes from the University of Nicosia. As part of a 2nd year Digital Design Course at [ARC] Department of Architecture, University of Nicosia, the participants were asked to model and 3D print parametric tiles using Rhino and paneling tools. The results where fascinating:

I’ve then decided to try to replicate the experiment and to show the process here. Instead of Rhino though, we will use Blender and its great add-on Sverchok. Sverchok is a parametric tool for architects and designer with a node-based layout. It is inspired by Grasshopper and has similar features. If you are interested in parametric design or you are already a Blender user, I encourage you to explore it, it has a great power and it is constantly under development.
In this tutorial we will see how we can use Sverchok to create parametric tiles similar to the ones that the students of the university of Nicosia did.
Before starting, make sure you have set up Blender for 3D printing like we explained in our tutorial. Now download the Sverchok add-on from its GitHub repository and install it. It will be become available in the Node editor.

We will try to go step by step, however, if you don’t understand something, please refer to the documentation or to the material listed in Nikitron webpage. Also, a basic knowledge of modeling with Blender is assumed.
Creating the asset
The first thing we want to do is creating a basic asset that will undergo the transformations. I chose the following shape, you can go for a simpler or more complicated one, just remember to subdivide it on the vertical plane a sufficient number of times (at least ten) in order to twist it later on. Also, it should have a rectangular base since it will lay on a squared grid.

The node tree
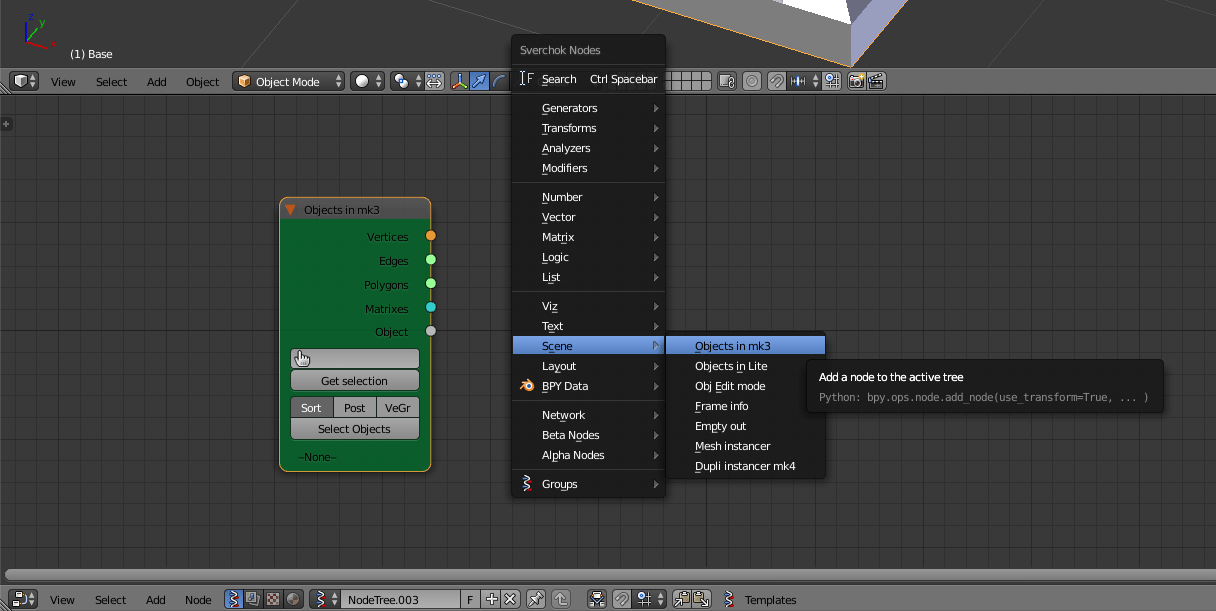
Now create a new Sverchok node tree and add a Objects in node. You can do this by pressing SHIFT+ A and look for the node or type it’s name under the Search function. Once you have added the node, make sure the asset that we have previously created is selected and click Get selection on the node.
Nothing happened but don’t worry. Add a Viewer Draw node and plug the Vertices and Polygons sockets: in the center of the scene you will find the asset recreated by Sverchok.

Now we are going to use a powerful node called Adaptive Polygons but first let’s create a plane via Sverchok.

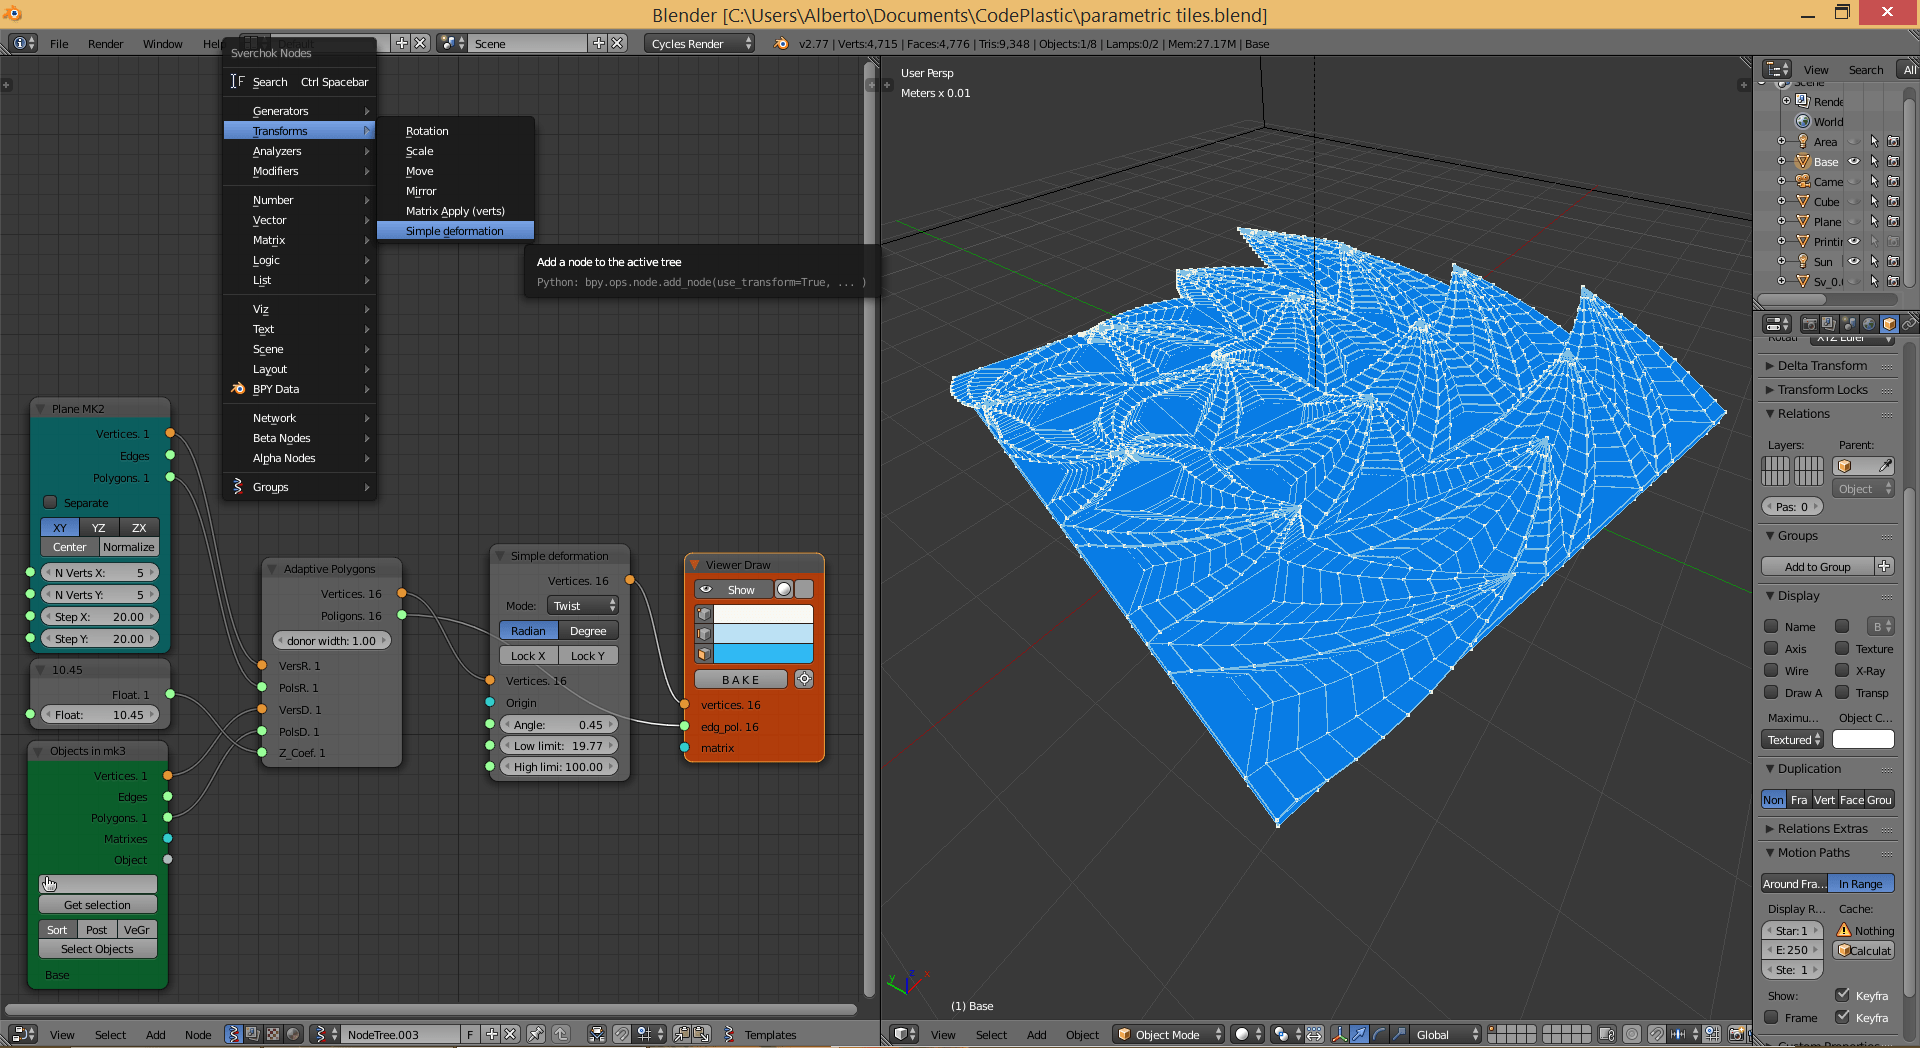
Now the magic, add the Adaptive Polygons node to the tree and plug the sockets as shown in the image (remember to center the plane):

This is already quite nice, but we can do much more. Let’s twist the assets, with the Simple deformation node.
This could already make a nice print. If you are happy with the result, click Bake in the Viewer Draw node and the new asset will be added to your Outliner.
How about introducing some randomness in our composition though? Try the Randomize input vertices node.

Although the node worked, unfortunately now our tile is not anymore a square; if you want to remedy to this problem, this could be an approach:

This is a worth printing tile! Before baking it, let’s add a last node, Mesh Join, which will join the 16 assets into one. Then we can press Bake.

Now rotate and scale the generated mesh according to your desired dimensions.

Export it to STL and you are ready for printing your parametric tiles. Now you can experiment with different base assets and parameters and see what you can came out with.
We will explore Sverchok also in future tutorials as there are many ways in which we can apply it to digital fabrication!


Very nice!!! Thanks for sharing!!!
Thanks Fabio!
Thanks a lot! really useful!
Glad to hear it 🙂