
How to use Blender and Sverchok to slice a 3D model for laser cutting and CNC milling.
Today we will see how we can use Blender’s Sverchok to slice a 3D model for laser cutting and CNC milling. The input for writing this article came from this Nikitron’s post, so the first credit goes there. If you are not familiar with Sverchok you can check some of our other tutorials.
Let’s start by creating a Suzanne for our example. When you slice an object it is important that it is manifold, so that all the generated slices are closed paths. You can check if an object is manifold in Blender by using the included 3D Printing add-on which also has a convenient function Make Manifold. Make sure to have your Susanne manifold before proceeding.

Let’s import Suzanne into Sverchok with the Object in node. We will then visualize it with Viewer BMesh.

Now we will create the main part of our node tree.

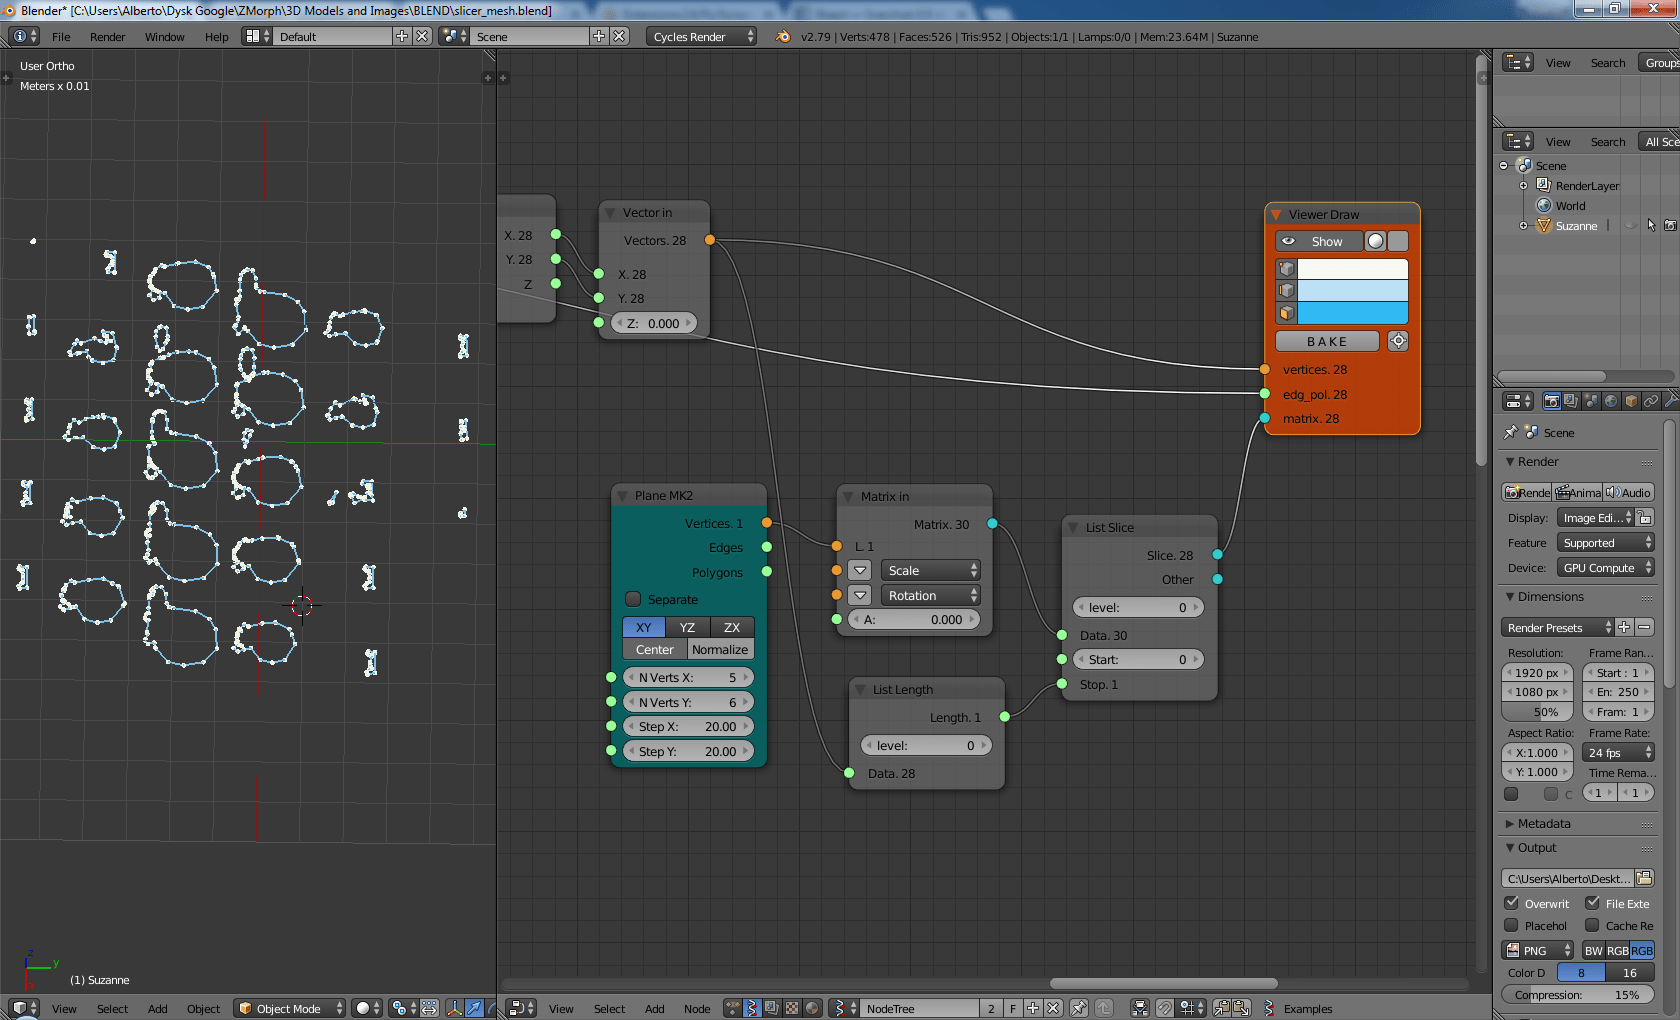
Basically we are creating a series of cutting matrices along the X axis of the object and parallel to the Y axis. We then pass these matrices to the Bisect node. Play with the plugs and with the rotation vector of the Matrix in node if you want to slice along another axis or direction.
If nothing appears on your screen, it is probably because because your start parameter in the Range Float node is too low. Try to tweak it until the slices appear in the 3D View. Or we can automate this process so that the right values are always passed to the node. Just do like this:

You can then control the distance between the slices through the step parameter in the Range Float node.
Good, now that our object is sliced we want to find an easy way to export the paths to the DXF files that we will then give to our CAM software. There are different ways to achieve this result, this is what I came out with.
First we rotate each slice around its own center, so that they are parallel to the XY plane. We also unify the Z coordinates to 0.

Now, with a list of matrices, we can arrange the slices on a plane. We need to us only as many matrices as there are slices in order to avoid duplicates.
Great, now we can bake our slices. If you want to have them aligned you can still select them and then CTL+ALT+SHIFT+C -> Geometry to Origin.
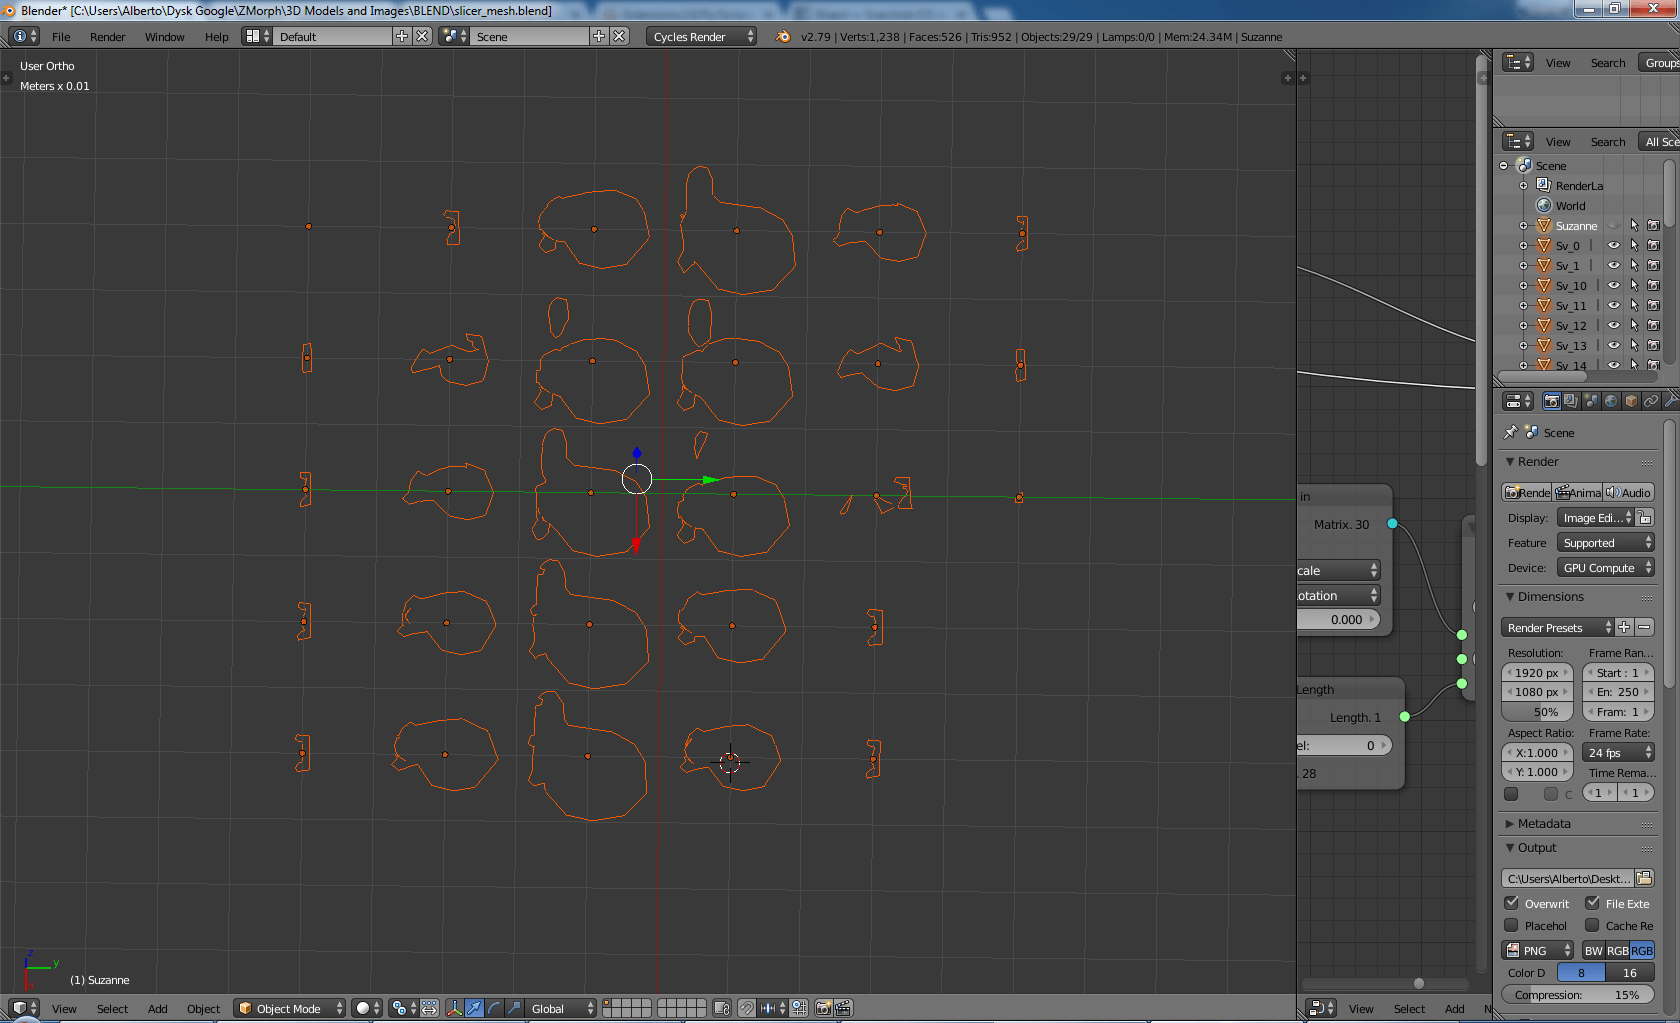
Now make sure that you are using an orthogonal top view and go to File and export the slices as DXF for your CAM and Laser/CNC machine!

Here is a gist for the node tree that you can download and import directly into Sverchok.
————————————————————————-
The Featured Image was taken from cgtrader.

Use waffle node for this task please.
Wow I had totally missed that node. I will update the post when I have a moment.
With delay but I wrote a post specifically for the waffle node http://www.codeplastic.com/2018/07/06/waffle-node-sverchok/